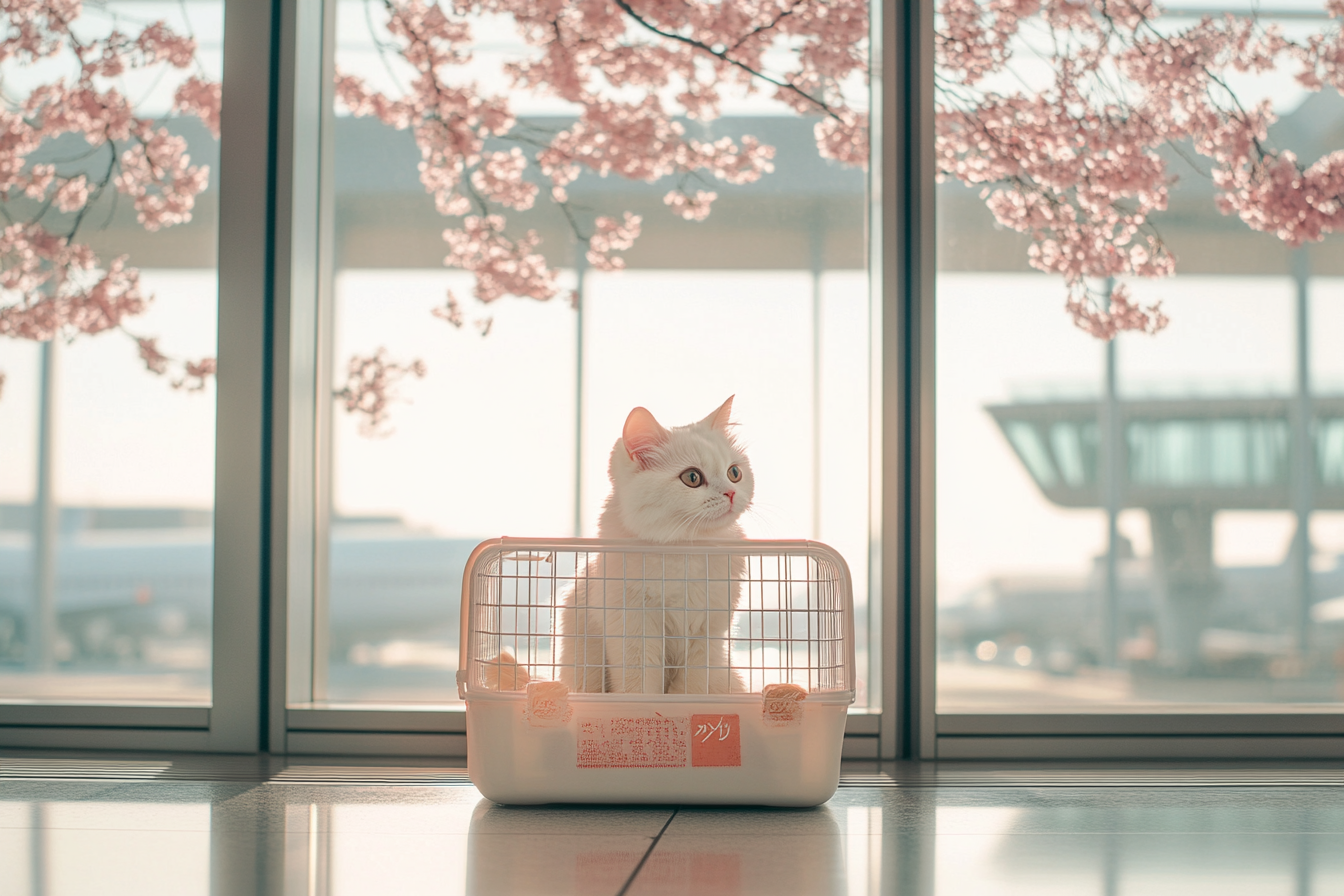
Japan takes rabies incredibly seriously — the country has been rabies-free since 1957 and enforces one of the world’s strictest pet import regimes to keep it that way. If you do not follow the import timeline precisely, your cat faces up to 180 days in a government quarantine facility at your expense. This is not a theoretical risk — it happens regularly to owners who miss a step or miscalculate the timeline. Here is the exact schedule you need to follow.
Why 180 Days?
The 180-day waiting period is Japan’s rabies incubation safeguard. Rabies can take up to 6 months to show symptoms in animals. By requiring a successful titer test (proving your cat has rabies antibodies) followed by a 180-day observation period in a rabies-free home environment, Japan can be confident that any imported animal is genuinely rabies-free. This is not bureaucratic excess — it is epidemiological science, and Japan, Australia, New Zealand, and Singapore all use similar logic.
The Timeline at a Glance
The entire process takes a minimum of 7 months from the first vet visit to the earliest possible arrival in Japan. You cannot shortcut any step. Japan’s Animal Quarantine Service (AQS) has zero flexibility — they will quarantine your cat for however many days are “missing” if you arrive before the 180-day period is complete.
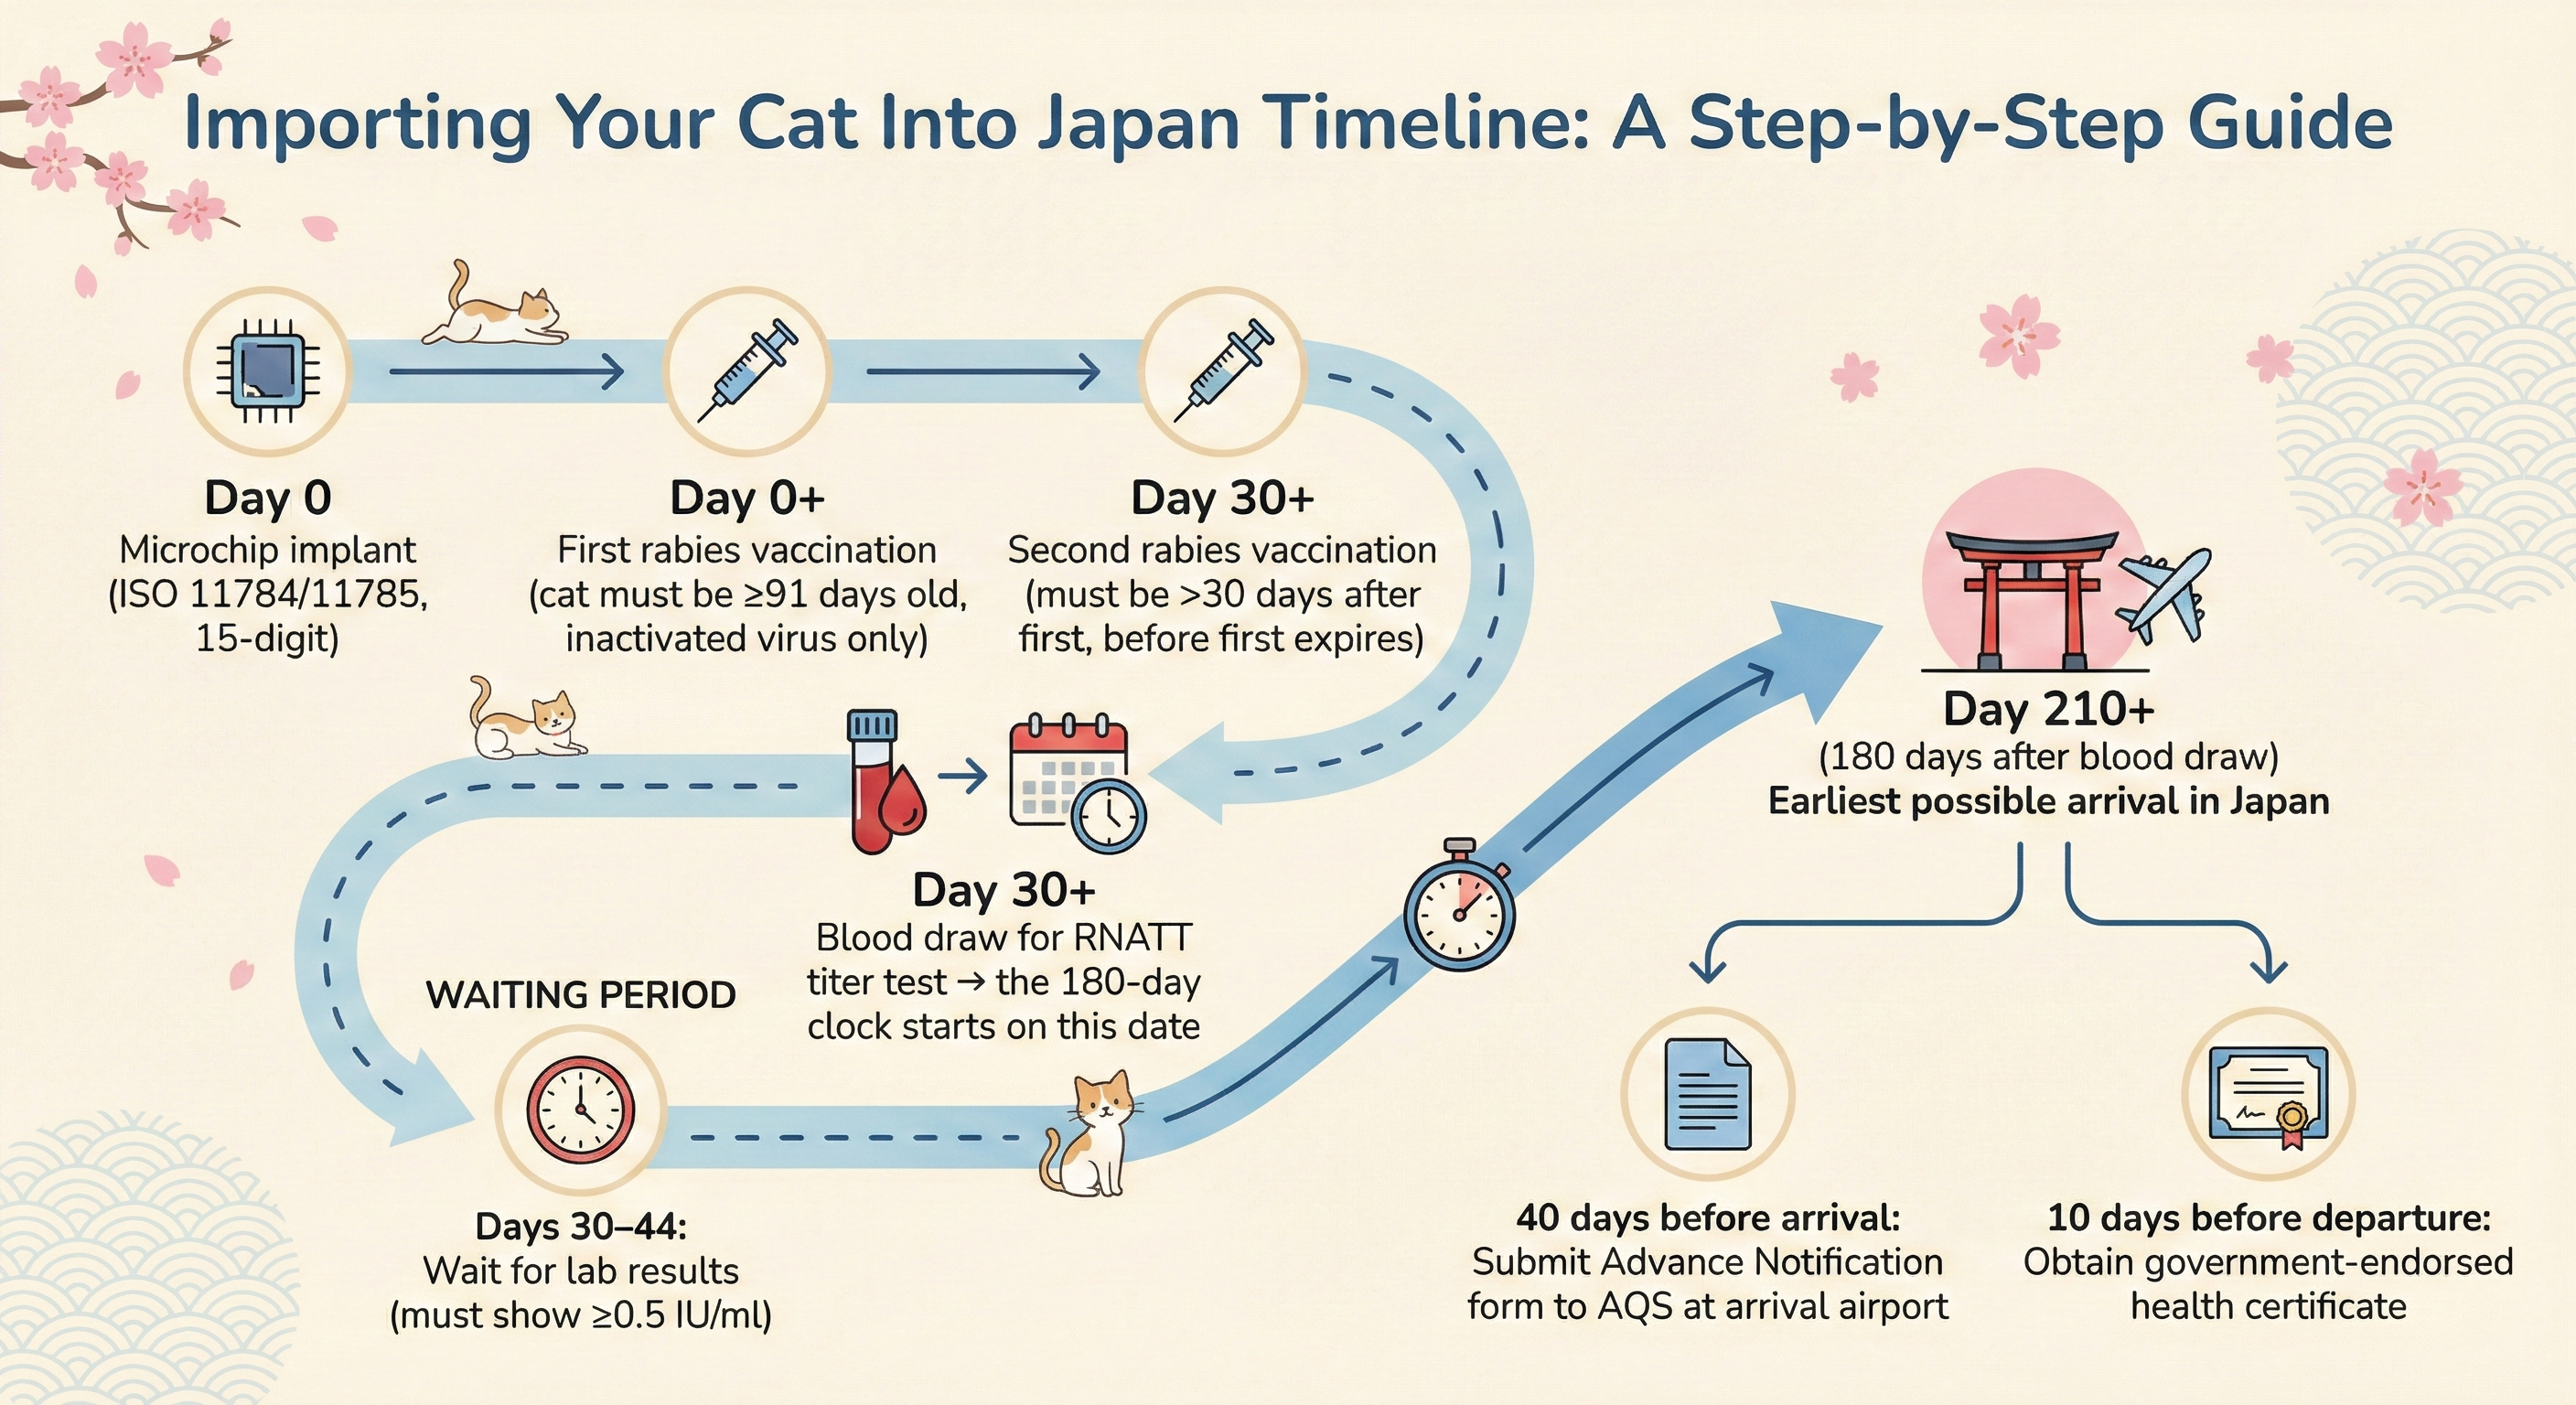
Minimum Timeline: 7+ Months Before Arrival
Day 0+: First rabies vaccination (cat must be ≥91 days old, inactivated virus only)
Day 30+: Second rabies vaccination (must be >30 days after first, before first expires)
Day 30+: Blood draw for RNATT titer test → the 180-day clock starts on this date
Days 30–44: Wait for lab results (must show ≥0.5 IU/ml)
Day 210+ (180 days after blood draw): Earliest possible arrival in Japan
40 days before arrival: Submit Advance Notification form to AQS at arrival airport
10 days before departure: Obtain government-endorsed health certificate
Step 1: Microchip (Day 0)
Your cat must be microchipped with an ISO 11784/11785 compliant, 15-digit chip before the first rabies vaccination. Japan is rigid on this — if the microchip is implanted after the vaccine, that vaccination does not count and you must start over. Both procedures can be done on the same vet visit, but the chip must be scanned and confirmed working before the needle goes in for the rabies jab.
This is a common failure point for US-based pet owners. Many American vets use 9-digit or 10-digit AVID or HomeAgain chips, which are not ISO compliant and will be rejected by Japan. If your cat already has a non-ISO chip, you have two options: implant a second ISO chip alongside it (vets do this routinely), or replace the original. Do not rely on bringing a compatible scanner — AQS inspectors use their own equipment.
Step 2: Two Rabies Vaccinations (Days 0–30+)
Japan requires two separate rabies vaccinations, not one. Your cat must be at least 91 days old for the first. The second must be given more than 30 days after the first, but before the first vaccine’s validity period expires (typically 12 months for most vaccines, but check the manufacturer’s datasheet).
Both vaccines must be inactivated (killed) virus or recombinant type. Modified live virus (MLV) vaccines are not accepted. Common accepted brands include Imrab 3, Nobivac Rabies, Purevax (recombinant), and Rabisin. Confirm with your vet that they are using an approved type — the vaccine product name must appear on the documentation.
The reason for two vaccinations is scientific: a single rabies vaccine produces a primary immune response, but a second (booster) dose given 30+ days later triggers a stronger, more durable secondary immune response. This makes the subsequent titer test more likely to return a passing result (≥0.5 IU/ml).
Step 3: Rabies Titer Test — RNATT (Day 30+)
After the second vaccination, your vet draws blood for a Rabies Neutralizing Antibody Titer Test (RNATT), also called the FAVN test. The result must show ≥0.5 IU/ml (international units per millilitre). This proves your cat’s immune system has responded to the vaccines and is producing rabies antibodies.
The blood must be sent to a laboratory approved by Japan — not just any lab. Japan maintains a specific list of approved facilities. Key approved labs include:
- •USA: Kansas State University Rabies Laboratory (most commonly used by US pet owners)
- •EU: ANSES Nancy Laboratory, France (standard for European pet owners)
- •UK: APHA Weybridge (Animal and Plant Health Agency)
- •Australia: ACDP, Coopers Plains
This is where the 180-day clock starts. The date the blood was drawn — not the date results come back — is Day 0 of the 180-day waiting period. Lab results typically take 2–3 weeks. If results come back below 0.5 IU/ml, you must revaccinate and retest, and the 180-day clock resets to the new blood draw date.
If Your Cat Fails the Titer Test
Step 4: The 180-Day Wait (Months 3–9)
This is the hardest part — waiting 6 months while doing essentially nothing. Your cat must remain in the exporting country during this entire period. Use the time productively:
- •Crate train your cat: Start with the crate open in a room, treats inside, building up to closed-door sessions and car rides. A cat comfortable in a crate travels vastly better.
- •Research airlines: Not all airlines fly pet cargo to Japan. JAL, ANA, and United are common options. Book cargo space early — it is limited and seasonal embargoes apply in summer heat.
- •Keep vaccinations current: If your cat’s rabies vaccination lapses during the 180-day wait, you may need to restart the entire process. Set a calendar reminder for the booster date.
- •Gather documents: Organise every certificate, lab report, and vaccination record into a single folder. Japan’s inspection is thorough and document-heavy.
Step 5: Advance Notification to AQS (40 Days Before Arrival)
At least 40 days before your planned arrival in Japan, submit the Advance Notification of Animal Importation form (Form A) to the Animal Quarantine Service office at your specific arrival airport. This is non-negotiable — arriving without prior notification means automatic quarantine.
You can submit by post or fax. As of 2026, AQS does not accept email submissions for this form (though this may change — check the MAFF website). Include your flight details, pet information, microchip number, and copies of all veterinary documents. AQS will review everything and send back an Approval of Inspection form, which you must present on arrival.
Step 6: Health Certificate (Within 10 Days of Departure)
Within 10 days of your departure, obtain a veterinary health certificate from an authorised government vet. In the US, this means a USDA-accredited vet, with the certificate then endorsed by APHIS (your state’s USDA Veterinary Services office). In the UK, use an Official Veterinarian and have APHA endorse it. In the EU, your national veterinary authority handles endorsement.
Japan has specific forms that must be used: Form A (Advance Notification, already submitted) and Form C (Health Certificate). Do not use generic health certificate forms — they will be rejected. Download the current forms from the Japanese Ministry of Agriculture, Forestry and Fisheries (MAFF) website.
What Happens if You Arrive Early?
If you arrive before the 180 days are up, your cat goes into quarantine at an AQS detention facility for the remaining days. You are responsible for all costs — approximately ¥3,000–¥5,000 per day at Narita or Haneda, plus one-time transport and handling fees. For a cat missing 60 days, that could be ¥180,000–¥300,000 (roughly $1,200–$2,000 USD).
You can visit during limited hours (typically 1–2 hours per day), but your cat cannot leave the facility under any circumstances until the full 180 days have passed from the blood draw date. The facilities are clean and professionally managed, but they are institutional — small cages, limited human interaction, and no home comforts.
Common Mistakes That Trigger Quarantine
❌ Titer test sent to a non-approved laboratory
❌ Rabies vaccination lapsed during the 180-day wait
❌ Advance notification not submitted 40+ days early
❌ Wrong health certificate form used (must be Japan Form C)
❌ Arriving at a non-designated airport or seaport
❌ Using a modified live virus vaccine instead of inactivated
❌ Non-ISO microchip (9 or 10 digits instead of 15)
Any single one of these errors can result in quarantine for up to 180 days.
Designated Entry Points
Pets can only enter Japan through designated airports and seaports. You cannot arrive at a random regional airport with your cat. The main designated airports are:
- •Narita (NRT) — Most common for international arrivals from US/Europe
- •Haneda (HND) — Convenient for Tokyo-bound travellers
- •Kansai (KIX) — Osaka/Kyoto region
- •Chubu/Centrair (NGO) — Nagoya region
- •New Chitose (CTS) — Hokkaido
- •Fukuoka (FUK) — Kyushu
Confirm your arrival airport is on the approved list before booking flights. The full list is available on the MAFF/AQS website. If your itinerary includes a domestic connection within Japan (e.g., fly to Narita, then connect to Sapporo), the AQS inspection happens at your first Japan entry point.
Cost Summary
Estimated Total Costs
Two rabies vaccinations: $60–$120 / £50–£100
RNATT titer test: $150–$300 / £100–£250 (lab + vet blood draw fee)
Health certificate + government endorsement: $150–$400 / £100–£300
Airline cargo fee (pet): $400–$1,500+ depending on airline and route
IATA crate: $80–$250 (if not already owned)
AQS inspection fee on arrival: Free (included in the process)
Total estimate: $900–$2,600+ / £700–£2,000+
 Japan
Japan Australia
 New Zealand
 Singapore
 South Korea